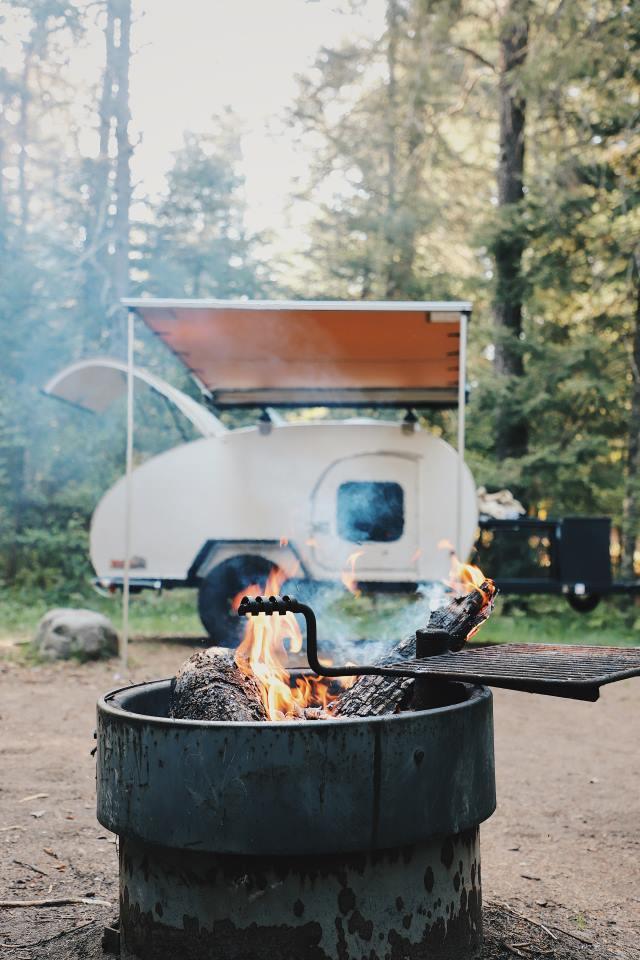
There’s something truly magical about cooking in the great outdoors. The aroma of sizzling food, the crackling of a campfire, and the anticipation of a flavorful meal under the open sky add an extra layer of enjoyment to any camping adventure. In this article, we’ll delve into the world of outdoor cooking, bringing you a collection of easy and delectable recipes specially crafted for car camping.
Whether you’re a seasoned outdoor chef or a novice looking to elevate your campfire cuisine, these recipes will ignite your taste buds and make your camping experience even more unforgettable. So, grab your cooking gear, fire up those stoves, and get ready to explore a world of flavors right at your campsite.
The Joy of Cooking on the Go
Cooking in the great outdoors isn’t just about preparing a meal; it’s a sensory experience that connects you with nature and heightens your appreciation for food. Whether you’re in the midst of a lush forest, by a tranquil lake, or nestled in a scenic campsite, the act of creating delicious dishes against the backdrop of Mother Nature’s beauty is truly joyful.
In this article, we’ll take you on a culinary journey designed for car campers, sharing a collection of easy and delightful recipes that bring a taste of home to your outdoor adventures. Whether you’re a camping novice or a seasoned outdoor chef, these recipes will inspire you to embrace the art of cooking on the go and savor every moment of your camping escapades. Let’s discover the pure delight of cooking in the wilderness.
Planning Your Car Camping Trip
Choosing the right campsite
Selecting the perfect campsite is like choosing the setting for a memorable story. It’s where your outdoor adventure begins and where you’ll create lasting memories. Whether you prefer the serenity of a secluded forest, the breathtaking vistas of a mountain ridge, or the soothing sounds of a lakeside retreat, your campsite sets the stage for your camping experience.

In this article, we’ll guide you through the art of choosing the right campsite, offering tips and insights to ensure your outdoor haven is not only comfortable but also harmonious with nature. Whether you’re a camping novice or an experienced outdoors enthusiast, the following advice will help you make an informed decision and set the scene for an unforgettable camping adventure. So, let’s explore the factors to consider when selecting your ideal campsite and embark on a journey into the heart of nature.
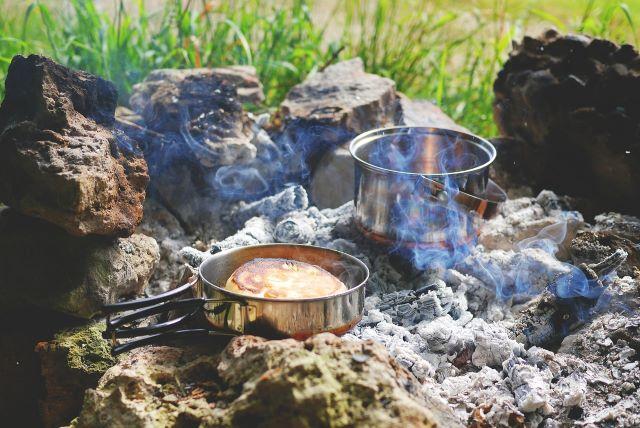
Essential cooking equipment to bring
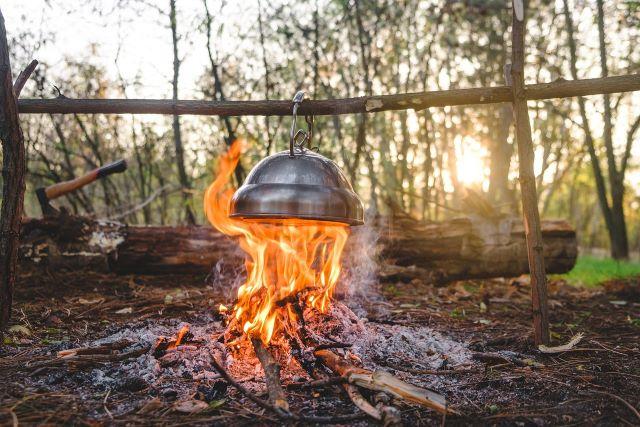
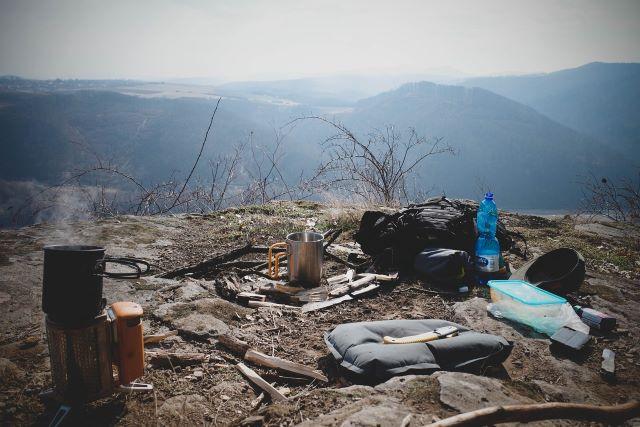
Imagine the aroma of sizzling bacon wafting through the crisp morning air, the sputtering sound of a campfire, and the promise of a hearty meal in the great outdoors. Cooking while camping can be a delightful experience, allowing you to savor delicious meals surrounded by nature’s beauty.
To embark on this culinary adventure, you’ll need the right cooking equipment that strikes a balance between convenience and functionality. In this article, we’ll explore the essential cooking equipment you should bring on your camping trip, ensuring that every meal you prepare is a flavorful success.
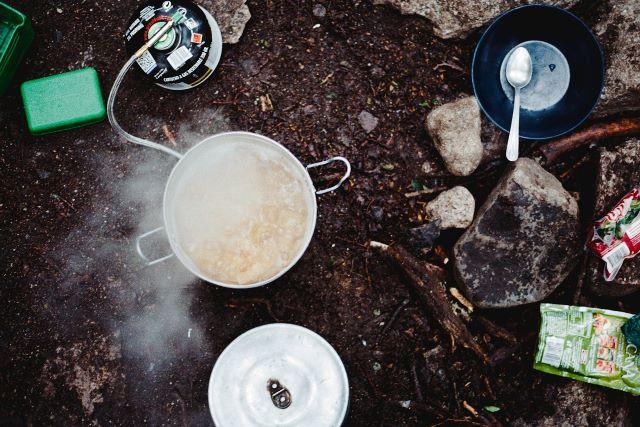
Whether you’re a seasoned camper or new to outdoor cooking, these tips will help you pack your camp kitchen with the tools you need to whip up tasty and satisfying dishes under the open sky. So, let’s dive into the world of campfire cooking and discover the must-have equipment that will turn your campsite into a gourmet haven.
Meal planning and preparation
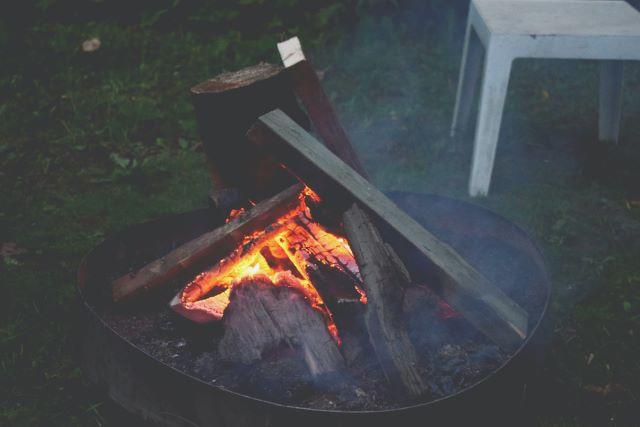
The sun dips below the horizon, casting a warm, golden glow over your campsite as you gather around the crackling campfire. It’s dinner time, and you’re looking forward to a hearty and delicious meal under the stars. One of the keys to a successful and enjoyable camping trip is thoughtful meal planning and preparation.
Whether you’re an experienced outdoor chef or new to campfire cooking, having a well-organized approach to your meals can make a world of difference. In this article, we’ll delve into the art of meal planning and preparation for your camping adventures, helping you create memorable dining experiences in the wilderness. From selecting the right recipes to packing essential ingredients and mastering campfire cooking techniques, we’ve got you covered.
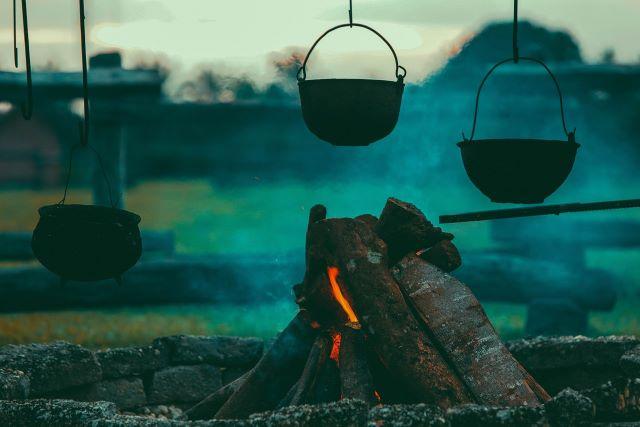
So, let’s explore the world of campsite cuisine and ensure that every meal you enjoy while camping is a delightful and satisfying experience.
Breakfast Recipes for Car Camping
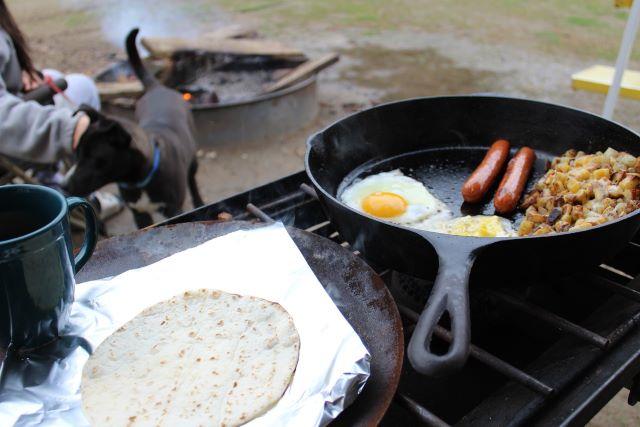
Campfire bacon and eggs
As the sun rises over your campsite and the crisp morning air fills your lungs, there’s nothing quite like the aroma of campfire bacon sizzling in the pan and eggs cooking to perfection. A hearty breakfast is the perfect way to kickstart your day of adventure, and this campfire bacon and eggs recipe is a classic favorite among campers. It’s simple, delicious, and requires minimal ingredients and equipment.
Ingredients:
- Bacon strips (2-3 per person)
- Eggs (2 per person)
- Salt and pepper (to taste)
- Cooking oil or butter (for the pan)
Equipment:
- Cast iron skillet or a portable camping griddle
- Long-handled tongs or a spatula
- Campfire or portable camping stove
Instructions:
- Prepare Your Fire: Start by building a campfire or setting up your portable camping stove. You’ll need a good bed of hot coals for cooking.
- Heat the Skillet: Place your cast iron skillet or camping griddle on the campfire grate or stove. Let it heat up for a few minutes. You can add a small amount of cooking oil or butter to prevent sticking.
- Cook the Bacon: Lay the bacon strips in the hot skillet. Use tongs or a spatula to flip them occasionally. Cook until they reach your desired level of crispiness. Remove the bacon from the skillet and place it on a plate lined with paper towels to drain excess grease.
- Cook the Eggs: Crack the eggs into the skillet, being careful not to break the yolks. Season with a pinch of salt and pepper. Cook the eggs until the whites are set, but the yolks are still slightly runny for that perfect sunny-side-up egg.
- Serve: Transfer the eggs to a plate alongside the crispy bacon. You can toast some bread on the campfire grate if you like, or enjoy your breakfast with a side of fresh fruit.
- Enjoy: Gather around the campfire with your fellow campers and savor this delicious, simple, and satisfying breakfast. The combination of smoky bacon and perfectly cooked eggs is sure to fuel your adventurous day ahead.
Pro Tips:
- To save time and effort, you can pre-scramble the eggs at home and store them in a spill-proof container for easy pouring onto the skillet at the campsite.
- Don’t forget to pack along some hot sauce or ketchup for extra flavor.
This campfire bacon and eggs breakfast is a camping classic that’s easy to prepare, leaving you more time to enjoy the great outdoors. It’s a comforting and filling way to start your day of camping adventures.
One-pot oatmeal with fruits and nuts
Waking up to the sounds of nature and a cool morning breeze during your camping trip is a special experience. And what better way to kickstart your day than with a warm and hearty bowl of one-pot oatmeal? This recipe combines the wholesome goodness of oats with the sweetness of fruits and the crunch of nuts. It’s not only delicious but also easy to make, leaving you with more time to enjoy the beauty of the outdoors.
Ingredients:
- Rolled oats (1 cup)
- Water (2 cups)
- Milk (1 cup)
- Honey or maple syrup (to taste)
- Mixed dried fruits (e.g., raisins, cranberries, apricots) (½ cup)
- Mixed nuts (e.g., almonds, walnuts, pecans) (½ cup)
- Cinnamon (½ teaspoon, optional)
- Salt (a pinch)
Equipment:
- Camping pot or Dutch oven
- Campfire or portable camping stove
- Spoon for stirring

Instructions:
- Prepare Your Fire: Start by setting up your campfire or portable camping stove. You’ll need a source of heat to cook the oatmeal.
- Combine Ingredients: In your camping pot or Dutch oven, add the rolled oats, water, and milk. Stir in a pinch of salt and the optional cinnamon for extra flavor.
- Cook on Low Heat: Place the pot over the campfire or stove and bring the mixture to a gentle simmer. Stir occasionally to prevent sticking. Let it cook for about 10-15 minutes, or until the oats have absorbed most of the liquid and have a creamy consistency.
- Add Sweetness: Drizzle honey or maple syrup over the oatmeal, adjusting the sweetness to your liking. Stir well to distribute the sweetness evenly.
- Add Fruits and Nuts: Toss in the mixed dried fruits and nuts. You can use a variety of your favorites for a burst of flavors and textures.
- Serve: Once the oatmeal is heated through and the fruits and nuts are mixed in, it’s ready to serve. Scoop it into bowls or mugs.
- Enjoy: Find a comfortable spot around your campsite, take in the natural surroundings, and savor your warm and nutritious one-pot oatmeal. It’s a comforting and energizing way to start your day of camping adventures.
Pro Tips:
- You can adjust the consistency of your oatmeal by adding more milk or water during cooking.
- Customize your oatmeal with your preferred dried fruits and nuts for a personalized touch.
- Don’t forget to pack some extra honey or syrup for drizzling over the top.
This one-pot oatmeal with fruits and nuts is a fantastic camping breakfast that provides the energy you need for a day of outdoor exploration. It’s a simple and satisfying way to enjoy the beauty of nature and delicious food simultaneously.
Dutch oven cinnamon rolls
Imagine waking up to the aroma of freshly baked cinnamon rolls wafting through your campsite. With this Dutch oven cinnamon roll recipe, you can turn that dream into a delicious reality. These warm, gooey treats are perfect for a leisurely camping breakfast or a sweet snack by the campfire. Let’s get baking!
Ingredients:
- Cinnamon roll dough (store-bought or homemade)
- Cooking spray or oil for greasing
- Brown sugar (½ cup)
- Ground cinnamon (1-2 tablespoons)
- Butter (2-3 tablespoons, melted)
- Cream cheese frosting (included with store-bought dough or homemade)
Equipment:
- Dutch oven (cast iron)
- Campfire or portable camping stove
- Heat-resistant gloves or oven mitts
- Tongs or cooking utensils
Instructions:
- Prepare Your Fire: Start by setting up your campfire, ensuring you have enough hot coals to maintain a consistent temperature. You’ll be using a Dutch oven for this recipe.
- Grease the Dutch Oven: Lightly grease the inside of your Dutch oven to prevent the cinnamon rolls from sticking. You can use cooking spray or a small amount of oil.
- Prep the Cinnamon Rolls: Open the package of cinnamon roll dough (store-bought) or roll out your homemade cinnamon roll dough. If using store-bought, follow the package instructions for unrolling the dough.
- Add Sugar and Cinnamon: Sprinkle a layer of brown sugar evenly on the unrolled dough. Follow this with a generous sprinkling of ground cinnamon. Drizzle melted butter over the sugar and cinnamon.
- Roll ‘Em Up: Roll up the dough tightly, starting from one end. You should end up with a log-like shape. Slice the dough into individual cinnamon rolls.
- Place in Dutch Oven: Arrange the cinnamon rolls in the greased Dutch oven, leaving a little space between each one.
- Bake in Dutch Oven: Place the lid on the Dutch oven and carefully position it over the campfire’s hot coals. Make sure the Dutch oven is stable and secure. Place some hot coals on top of the lid.
- Check and Rotate: Check the cinnamon rolls after about 15-20 minutes. They should be golden brown and baked through. You may need to rotate the Dutch oven occasionally to ensure even cooking.
- Frost and Serve: Remove the Dutch oven from the coals, carefully open the lid (use gloves or mitts), and let the cinnamon rolls cool slightly. If using store-bought dough, use the provided cream cheese frosting. For homemade frosting, drizzle it over the warm cinnamon rolls.
- Enjoy: Dig in while they’re warm and gooey. These Dutch oven cinnamon rolls are a delightful camping treat that will have everyone asking for seconds.
Pro Tips:
- Don’t forget your Dutch oven lid lifter and heat-resistant gloves for safety.
- You can customize these cinnamon rolls by adding chopped nuts or raisins to the filling.
- Adjust the amount of brown sugar and cinnamon to suit your taste preferences.
With Dutch oven cinnamon rolls, you can elevate your camping breakfast or dessert game. The joy of biting into these warm, sugary delights in the great outdoors is an experience you won’t soon forget.
Lunch Recipes for Car Camping
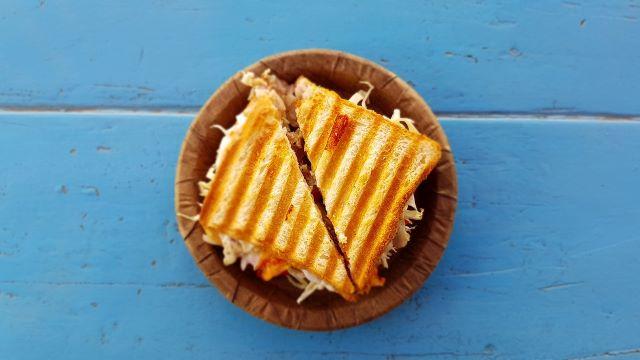
Grilled sandwiches with a twist
When it comes to lunch during a car camping adventure, you want something that’s satisfying, easy to prepare, and, most importantly, delicious. These grilled sandwiches with a twist fit the bill perfectly. Whether you’re enjoying them at your campsite or as a portable meal on a hike, they’re sure to be a hit. Let’s dive into this delightful campfire cooking recipe!
Ingredients:
- Bread slices (your choice of type)
- Deli meats (turkey, ham, roast beef, etc.)
- Cheese slices (cheddar, Swiss, pepper jack, etc.)
- Fresh vegetables (tomato slices, lettuce, onion rings, etc.)
- Condiments (mayonnaise, mustard, ketchup, etc.)
- Butter or cooking oil
Equipment:
- Campfire or portable camping stove
- Grilling grate or sandwich press
- Cooking utensils
Instructions:
- Prep Your Ingredients: Lay out your bread slices and start building your sandwiches. Layer the deli meats, cheese, fresh vegetables, and condiments as desired.
- Butter or Oil: Lightly butter or oil the outsides of the bread slices. This will help achieve that perfectly crispy, golden-brown finish.
- Heat the Grill: Place your grilling grate or sandwich press over the campfire or portable camping stove. Make sure it’s hot and ready for cooking.
- Grill the Sandwiches: Carefully place your assembled sandwiches on the grill. Grill them on one side until the bread is toasted and the cheese is melting, which should take about 3-5 minutes.
- Flip and Repeat: Using cooking utensils or a spatula, flip the sandwiches to grill the other side. Again, wait until it’s nicely toasted and the cheese is melted.
- Serve: Remove your grilled sandwiches from the heat, let them cool slightly, and cut them in half. Serve them up, and enjoy your campfire-cooked twist on classic grilled sandwiches.
Pro Tips:
- Get creative with your sandwich fillings. Try different combinations of meats, cheeses, and veggies to suit your taste.
- For a touch of smoky flavor, consider using a cast-iron skillet or griddle on your campfire.
- Don’t forget to pack some chips, pickles, or coleslaw as side dishes to complete your campsite lunch.
These grilled sandwiches are a tasty and convenient lunch option for your car camping trip. Plus, the added element of cooking them over the campfire or portable stove gives them that authentic outdoor flavor. Enjoy your satisfying and flavorful campsite meal!
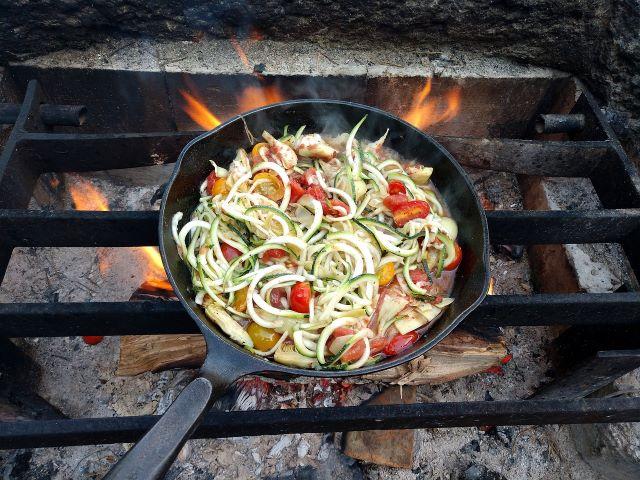
Fresh and easy pasta salad
For a refreshing and satisfying lunch option during your car camping adventure, whip up this fresh and easy pasta salad. It’s packed with flavors and textures that will keep you energized for your outdoor activities. Let’s dive into this simple and delicious campfire cooking recipe!
Ingredients:
- Pasta of your choice (penne, rotini, or bowtie work well)
- Cherry tomatoes, halved
- Cucumber, diced
- Red bell pepper, diced
- Red onion, finely chopped
- Black olives, sliced
- Feta cheese, crumbled
- Fresh basil leaves, torn
- Olive oil
- Balsamic vinegar
- Salt and pepper to taste
Equipment:
- Campfire or portable camping stove
- Large mixing bowl
- Cooking pot
- Strainer
- Cooking utensils
Instructions:
- Cook the Pasta: Boil water in a cooking pot over your campfire or camping stove. Add a pinch of salt and cook the pasta according to the package instructions until it’s al dente. Drain the pasta in a strainer and let it cool.
- Prepare the Veggies: While the pasta is cooking, prepare your vegetables by chopping the cherry tomatoes, cucumber, red bell pepper, red onion, and black olives. Set them aside.
- Mix the Salad: In a large mixing bowl, combine the cooked and cooled pasta with the prepared vegetables. Toss them together gently.
- Add the Extras: Sprinkle the crumbled feta cheese and torn basil leaves over the pasta and veggies.
- Dress It Up: Drizzle olive oil and balsamic vinegar over the salad, and season with salt and pepper to taste.
- Toss and Serve: Gently toss all the ingredients together to ensure everything is well coated with the dressing. Taste and adjust the seasonings if needed.
- Chill and Enjoy: Cover the bowl and refrigerate your pasta salad for at least 30 minutes before serving. This allows the flavors to meld together and makes for a refreshing campsite meal.
Pro Tips:
- Customize your pasta salad with your favorite veggies or add grilled chicken, shrimp, or tofu for a protein boost.
- Transport your pasta salad in a sealable container to keep it fresh during your outdoor adventures.
- Fresh lemon juice or a sprinkle of grated Parmesan cheese can add an extra layer of flavor to your salad.
This fresh and easy pasta salad is a quick and nutritious lunch option for your car camping trip. Its vibrant colors and zesty flavors are sure to brighten up your campsite meal. Enjoy the simplicity and deliciousness of this dish while taking in the great outdoors!
Stuffed bell peppers cooked on the campfire
When it comes to hearty and satisfying campfire meals, stuffed bell peppers are a fantastic choice. Packed with a flavorful filling and cooked to perfection over an open flame, these peppers are a camping delight. Let’s dive into this simple and delicious campfire cooking recipe!
Ingredients:
- Bell peppers (one per camper)
- Ground meat of your choice (beef, turkey, or sausage)
- Rice
- Onion, finely chopped
- Garlic, minced
- Tomato sauce or diced tomatoes
- Grated cheese (cheddar, mozzarella, or your favorite)
- Olive oil
- Salt and pepper to taste
- Optional seasonings (paprika, Italian seasoning, or chili flakes)
Equipment:
- Campfire or portable camping stove
- Heavy-duty aluminum foil
- Large mixing bowl
- Cooking pot or pan
- Cooking utensils
Instructions:
- Prepare the Peppers: Cut the tops off the bell peppers and remove the seeds and membranes. Set them aside.
- Cook the Filling: In a large mixing bowl, combine the ground meat, rice, chopped onion, minced garlic, and your choice of seasonings. Mix well.
- Stuff the Peppers: Carefully stuff each bell pepper with the filling mixture. Fill them to the top but avoid over-packing as the rice will expand during cooking.
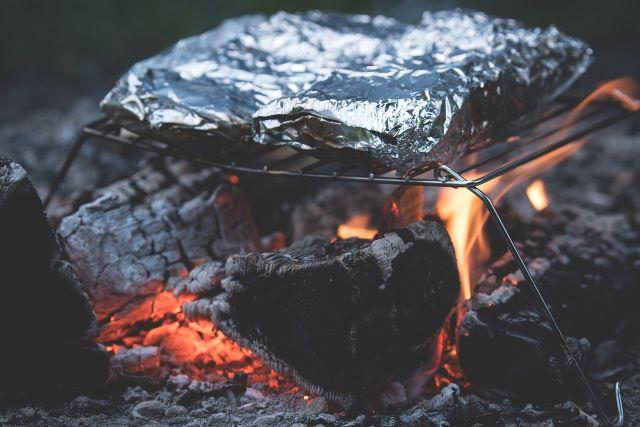
- Create Foil Packets: Tear off large squares of heavy-duty aluminum foil, one for each stuffed pepper. Place a stuffed pepper in the center of each foil square.
- Add Sauce and Cheese: Drizzle a bit of olive oil over each stuffed pepper, then pour tomato sauce or diced tomatoes on top. Sprinkle grated cheese over the sauce.
- Wrap and Seal: Fold the aluminum foil around each stuffed pepper, creating a tight packet. Make sure the packets are sealed securely to prevent any leakage.
- Campfire Cooking: Place the foil packets on the campfire grate or a suitable cooking surface. Cook for about 20-30 minutes, turning occasionally to ensure even cooking. The peppers should become tender, and the filling should be thoroughly cooked.
- Check for Doneness: Carefully open one of the foil packets and check if the rice and meat are cooked to your liking. If needed, continue cooking until done.
- Serve and Enjoy: Once the stuffed peppers are cooked to perfection, carefully open the foil packets and transfer them to plates. Let them cool for a moment before digging in.
Pro Tips:
- Experiment with different fillings by adding vegetables, beans, or your favorite spices for extra flavor.
- For a smoky campfire taste, consider using wood chips or a smoking pouch while cooking.
- Remember to handle the hot foil packets with care, using oven mitts or a towel to prevent burns.
Stuffed bell peppers cooked on the campfire are a delightful and wholesome camping meal. They’re easy to prepare, satisfying, and offer a comforting taste of home while you’re in the great outdoors. Enjoy the warmth and flavor of this campfire classic on your next adventure!
Dinner Recipes for Car Camping
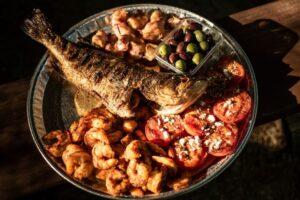
Foil packet seafood medley
For a delectable dinner that brings the taste of the sea to your campsite, try this foil-packed seafood medley recipe. It’s a breeze to prepare and even easier to savor under the open sky. Let’s dive into the details of this delicious campfire cooking adventure!
Ingredients:
- Assorted seafood (shrimp, mussels, clams, or your favorites)
- Sliced vegetables (bell peppers, onions, zucchini, and cherry tomatoes)
- Garlic cloves, minced
- Fresh herbs (parsley, basil, or cilantro)
- Lemon slices
- Olive oil
- Salt and pepper to taste
- Optional seasonings (Old Bay seasoning, paprika, or red pepper flakes)
Equipment:
- Campfire or portable camping stove
- Heavy-duty aluminum foil
- Large mixing bowl
- Cooking utensils
Instructions:
- Prepare the Foil Packets: Tear off large squares of heavy-duty aluminum foil, one for each serving. Place a generous portion of assorted seafood in the center of each foil square.
- Add Vegetables and Flavor: Surround the seafood with slices of vegetables, minced garlic, and your choice of fresh herbs. Place lemon slices on top for a zesty kick.
- Season and Drizzle: Season the seafood and vegetables with salt, pepper, and your preferred seasonings. Drizzle everything with olive oil to keep the ingredients moist and flavorful.
- Wrap and Seal: Carefully fold the aluminum foil around the seafood and vegetables, creating a well-sealed packet. Ensure that the packet is tightly sealed to retain all the delicious juices.
- Campfire Cooking: Place the foil packets on the campfire grate or a suitable cooking surface. Cook for approximately 10-15 minutes, turning once or twice to ensure even cooking. The seafood should become opaque and easily flake with a fork.
- Check for Doneness: Open one of the foil packets to check if the seafood is cooked to perfection. It should be tender, juicy, and flavorful.
- Serve and Savor: Carefully unwrap the foil packets, and transfer the succulent seafood and vegetables to plates. Garnish with fresh herbs and lemon wedges for extra zest.
Pro Tips:
- Customize the seafood medley with your favorite catch, whether it’s shrimp, mussels, clams, or a combination.
- Add a splash of white wine or a dash of hot sauce for an extra layer of flavor.
- Serve your foil packet seafood medley with a side of crusty bread or cooked rice for a complete meal.
Foil packet seafood medley is a delightful camping dinner that captures the essence of the ocean. The flavors meld together beautifully in the foil packets, creating a mouthwatering dish that’s perfect for your outdoor culinary adventures. Enjoy the taste of the sea by the campfire!
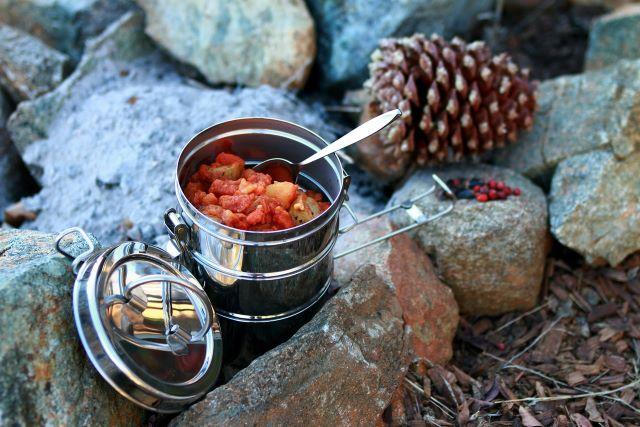
Campfire chili with a side of cornbread
When it comes to hearty and satisfying campfire dinners, few dishes rival a steaming bowl of chili paired with warm cornbread. This campfire chili recipe is packed with flavor, and it’s incredibly easy to prepare in the great outdoors. Let’s get cooking!
Ingredients:
For the Campfire Chili:
- 1 pound ground beef or ground turkey
- 1 onion, chopped
- 2 cloves garlic, minced
- 1 can (15 ounces) kidney beans, drained and rinsed
- 1 can (15 ounces) black beans, drained and rinsed
- 1 can (15 ounces) diced tomatoes
- 1 can (6 ounces) tomato paste
- 1 cup beef or vegetable broth
- 2 tablespoons chili powder
- 1 tablespoon cumin
- 1 teaspoon paprika
- Salt and pepper to taste
- Cooking oil
For the Cornbread:
- 1 cup cornmeal
- 1 cup all-purpose flour
- 1/4 cup sugar
- 1 tablespoon baking powder
- 1/2 teaspoon salt
- 1 cup milk
- 1/4 cup vegetable oil
- 1 egg
Equipment:
- Campfire or portable camping stove
- Cast iron Dutch oven or a large heavy-bottomed pot
- Mixing bowls
- Cooking utensils
- Foil (for lining the Dutch oven)
Instructions:
- Prepare the Campfire: Set up your campfire and allow it to burn down to hot coals.
- Cook the Chili: Place a Dutch oven on a grill grate or suitable campfire cooking surface. Add a bit of cooking oil to prevent sticking. Brown the ground beef (or turkey) with chopped onions and minced garlic until the meat is no longer pink and the onions are translucent.
- Add the Ingredients: Stir in the kidney beans, black beans, diced tomatoes, tomato paste, beef (or vegetable) broth, chili powder, cumin, paprika, salt, and pepper. Mix well, ensuring all ingredients are combined.
- Simmer: Cover the Dutch oven with its lid and let the chili simmer over the campfire for about 30 minutes to 1 hour. Stir occasionally to prevent sticking.
- Prepare the Cornbread Batter: In a separate bowl, mix cornmeal, all-purpose flour, sugar, baking powder, and salt. In another bowl, whisk together milk, vegetable oil, and an egg. Combine the wet and dry ingredients, stirring until just mixed.
- Bake the Cornbread: Line the bottom of a second Dutch oven with foil and grease it. Pour in the cornbread batter. Place this Dutch oven over the campfire and bake for 20-25 minutes, or until a toothpick inserted into the center comes out clean.
- Serve and Enjoy: Dish out bowls of steaming campfire chili and serve with a side of warm cornbread. Garnish with shredded cheese, sour cream, or chopped green onions, if desired.
Pro Tips:
- Customize your campfire chili with your preferred level of spiciness by adjusting the chili powder and paprika.
- Be mindful of the heat underneath the Dutch oven to prevent burning or sticking.
- For a quicker option, use canned chili and focus on baking the cornbread.
Campfire chili and cornbread are the ultimate comfort food combination for a camping trip. The rich, savory chili pairs perfectly with the sweet, crumbly cornbread, creating a campfire meal that’s sure to warm your soul under the starry night sky. Enjoy your outdoor feast!
Veggie skewers with a flavorful marinade
Vegetarian campfire meals can be just as delicious and satisfying as any other dish, and these veggie skewers with a flavorful marinade are proof of that. Packed with colorful vegetables and a zesty marinade, this recipe brings a burst of freshness to your campfire cooking. Let’s get grilling!
Ingredients:
For the Veggie Skewers:
- Assorted vegetables, such as bell peppers, zucchini, cherry tomatoes, mushrooms, and red onion, cut into chunks
- Wooden skewers, soaked in water for at least 30 minutes
For the Marinade:
- 1/4 cup olive oil
- 2 cloves garlic, minced
- 2 tablespoons balsamic vinegar
- 1 teaspoon honey or maple syrup
- 1 teaspoon Dijon mustard
- 1/2 teaspoon dried oregano
- Salt and pepper to taste
Equipment:
- Campfire or portable camping grill
- Mixing bowl
- Zip-top bag (for marinating)
- Cooking utensils
Instructions:
- Prepare the Campfire: Set up your campfire or portable camping grill and allow it to reach a medium-high heat.
- Prepare the Marinade: In a mixing bowl, combine olive oil, minced garlic, balsamic vinegar, honey (or maple syrup), Dijon mustard, dried oregano, salt, and pepper. Whisk the ingredients together until well blended.
- Marinate the Veggies: Place the vegetable chunks in a zip-top bag and pour the marinade over them. Seal the bag and gently massage it to ensure the vegetables are coated evenly. Let them marinate for at least 15-30 minutes, if possible.
- Assemble the Skewers: Thread the marinated vegetable chunks onto the soaked wooden skewers, alternating between different veggies to create colorful skewers.
- Grill the Skewers: Place the skewers on the campfire grill or portable camping grill, turning occasionally to ensure even cooking. Grill for about 10-15 minutes or until the vegetables are tender and slightly charred.
- Serve and Enjoy: Remove the veggie skewers from the grill, let them cool slightly, and then serve. Drizzle any remaining marinade over the skewers for an extra burst of flavor.
Pro Tips:
- Get creative with your vegetable choices. You can also add fruits like pineapple or tofu for variety.
- Don’t forget to soak the wooden skewers to prevent them from burning during grilling.
- Adjust the sweetness and tanginess of the marinade by tweaking the honey and vinegar proportions to your liking.
These veggie skewers with a flavorful marinade are a delightful and healthy addition to your campfire menu. The smoky, grilled goodness of the vegetables pairs perfectly with the zesty marinade, making this a must-try recipe for your next camping adventure.
Snacks and Appetizers
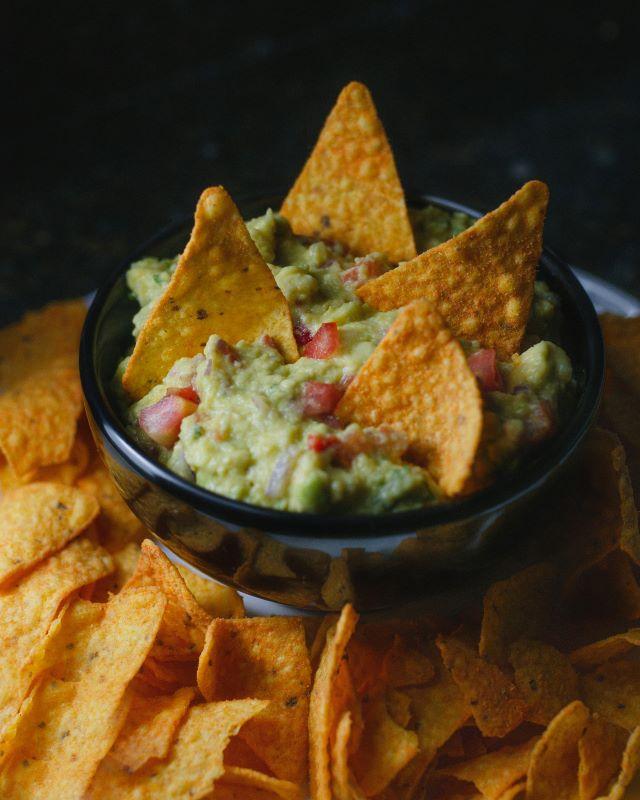
Campfire nachos
When you’re out camping, a hearty and delicious snack can elevate your outdoor experience. Campfire nachos are a crowd-pleaser that’s easy to make and even easier to enjoy. Get ready to indulge in this camping classic with a tasty twist!
Ingredients:
- Tortilla chips (enough to cover the bottom of your cast-iron skillet or aluminum foil packet)
- 1 cup cooked and shredded chicken (optional)
- 1 cup shredded cheese (cheddar, Monterey Jack, or your favorite)
- 1/2 cup black beans, drained and rinsed
- 1/2 cup diced tomatoes
- 1/4 cup diced red onion
- 1/4 cup sliced black olives
- 1/4 cup sliced jalapeños (adjust to your spice preference)
- 1/4 cup chopped fresh cilantro (optional)
- 1/4 cup sour cream
- 1/4 cup guacamole or diced avocado
- Salsa for dipping
Equipment:
- Campfire or portable camping grill
- Cast-iron skillet or aluminum foil packet
Instructions:
- Prepare the Campfire: Set up your campfire or portable camping grill and let it burn down to create hot coals.
- Layer the Ingredients: If using a cast-iron skillet, place it over the campfire. Start by adding a layer of tortilla chips to cover the bottom of the skillet (or aluminum foil packet).
- Add Toppings: Sprinkle the shredded chicken (if using), shredded cheese, black beans, diced tomatoes, diced red onion, black olives, and sliced jalapeños over the tortilla chips. You can adjust the quantities based on your preferences.
- Cook Over the Campfire: Carefully place the skillet (or wrap the foil packet) on a grill grate over the campfire. Cover with a lid or foil to help melt the cheese and heat the toppings. Cook for about 5-10 minutes, or until the cheese is melted and the nachos are heated through. Keep a close eye to prevent burning.
- Serve and Garnish: Remove the skillet or foil packet from the campfire. Sprinkle fresh cilantro over the nachos, if desired. Serve with sour cream, guacamole or diced avocado, and salsa for dipping.
Pro Tips:
- Customize your nachos with additional toppings like diced bell peppers, green onions, or shredded lettuce.
- For a meatless option, omit the chicken or use a meat substitute like crumbled tofu.
- Use a cast-iron skillet with a lid to help melt the cheese evenly.
- Keep the nachos from sticking to the skillet by greasing it lightly with oil before adding the chips.
Campfire nachos are the ideal snack or appetizer for your camping adventure. They’re quick to prepare, shareable, and incredibly satisfying. Whether you’re sitting around the campfire with friends or enjoying a solo adventure, these nachos will add a flavorful kick to your camping menu.
Trail mix with a variety of ingredients
When you’re out exploring the great outdoors, having a convenient and energy-packed snack like trail mix can keep you fueled and satisfied during your adventures. This homemade trail mix recipe combines a variety of ingredients to provide a perfect balance of flavors and nutrition.
Ingredients:
- 1 cup almonds
- 1 cup cashews
- 1 cup peanuts
- 1 cup dried cranberries
- 1 cup raisins
- 1/2 cup dark chocolate chips
- 1/2 cup M&M’s or your favorite chocolate candy
- 1/2 cup pretzels
- 1/2 cup dried banana chips or banana slices
- 1/2 cup dried apricots, chopped
Equipment:
- Large mixing bowl
- Airtight container or resealable bags for storage
Instructions:
- Prepare Ingredients: If your almonds and cashews are raw, you can roast them for extra flavor. To do this, spread them on a baking sheet and roast in a preheated oven at 350°F (175°C) for about 10-12 minutes, or until lightly golden. Allow them to cool completely before using.
- Mix It Up: In a large mixing bowl, combine all the ingredients – almonds, cashews, peanuts, dried cranberries, raisins, dark chocolate chips, M&M’s, pretzels, dried banana chips, and chopped dried apricots. Feel free to adjust the quantities to your taste.
- Toss and Combine: Gently toss all the ingredients together until well combined. Make sure the ingredients are evenly distributed for a balanced trail mix.
- Portion and Store: Depending on your preferences and the length of your camping trip, you can portion the trail mix into resealable bags or an airtight container. This makes it easy to grab a snack whenever you need an energy boost on the trail.
Pro Tips:
- Customize your trail mix by adding your favorite nuts, seeds, or dried fruits.
- For a healthier option, opt for unsalted nuts and dark chocolate with a higher cocoa percentage.
- Keep your trail mix cool and protected from direct sunlight to prevent chocolate from melting.
This homemade trail mix is not only delicious but also a convenient snack for your camping adventures. Packed with nuts, dried fruits, chocolate, and a hint of saltiness from pretzels, it’s designed to keep you energized while you explore the wilderness. Whether you’re hiking, biking, or simply relaxing at the campsite, this trail mix will be your go-to snack for sustained energy and enjoyment.
Desserts
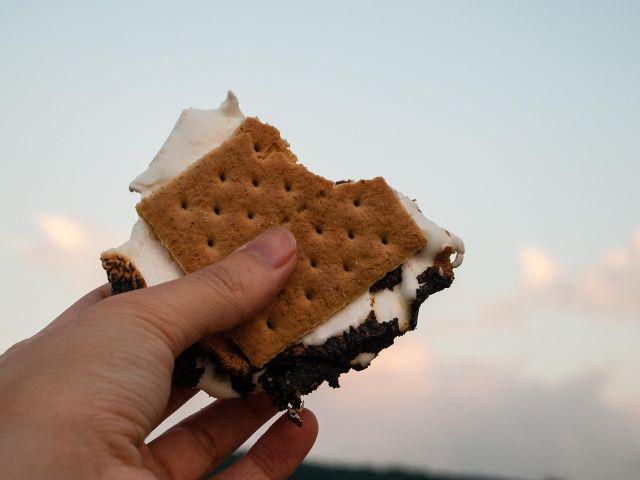
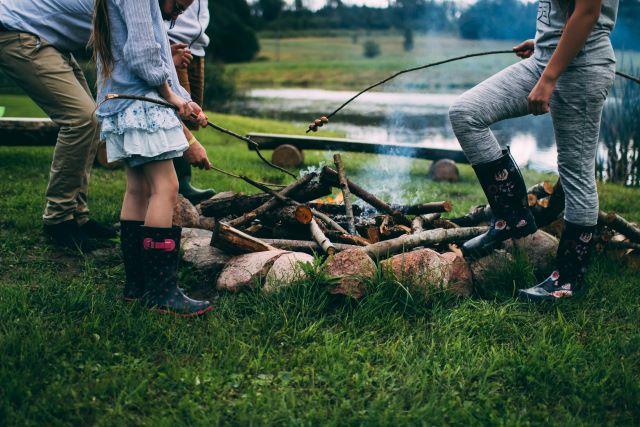
S’mores with a twist
S’mores are a classic camping dessert, but why not elevate them with a twist? This campfire recipe adds a burst of flavor and fun to the traditional treat by incorporating different ingredients. Get ready to enjoy a delightful camping dessert that will have everyone asking for s’more!
Ingredients:
- Graham crackers
- Marshmallows
- Chocolate bars (dark, milk, or white chocolate)
- Sliced strawberries
- Sliced bananas
- Peanut butter
- Honey
Equipment:
- Roasting sticks or skewers
Instructions:
- Prep Your Ingredients: Slice the strawberries and bananas into thin rounds. Break the graham crackers into halves or quarters, depending on your preference. Unwrap the chocolate bars.
- Create Your S’more Bases: Take a graham cracker half and spread a thin layer of peanut butter on it. Place a slice of banana or strawberry on top of the peanut butter.
- Toast Your Marshmallows: Roast your marshmallows to your preferred level of gooeyness over the campfire. If you’re using skewers, carefully slide the marshmallow off the skewer onto your prepared graham cracker and toppings.
- Add Chocolate: Place a piece of chocolate on top of the warm marshmallow.
- Drizzle with Honey: For an extra touch of sweetness, drizzle honey over the chocolate and marshmallow.
- Top It Off: Place another graham cracker half on top to complete your s’more.
- Enjoy Your Unique S’more: Take a bite and relish the combination of gooey marshmallow, creamy peanut butter, fresh fruit, and rich chocolate. The honey adds an extra layer of sweetness and binds it all together.
Pro Tips:
- Get creative with your s’more variations by adding other fruits like raspberries or even a sprinkle of cinnamon for extra flavor.
- Make sure your marshmallow is well-roasted for that perfect campfire taste.
This unique twist on the classic s’mores recipe adds a burst of flavor and freshness, making it the perfect camping dessert. It’s a delightful treat that combines the sweet, creamy, and fruity elements into one harmonious bite. Enjoy your campfire night with these mouthwatering s’mores, and let the campfire tales flow!
Campfire banana boats
Campfire banana boats are a delectable camping dessert that combines the natural sweetness of bananas with a variety of toppings. This simple yet satisfying treat is easy to make and can be customized to suit your taste. Get ready to embark on a culinary adventure under the stars with this delightful campfire recipe.
Ingredients:
- Ripe bananas (one per serving)
- Mini marshmallows
- Chocolate chips
- Chopped nuts (e.g., walnuts or pecans)
- Mini M&M’s or other favorite toppings
- Foil
Equipment:
- Campfire or grill with hot coals
- Forks or wooden skewers for handling
Instructions:
- Prepare the Bananas: Leave the peel on the bananas and make a lengthwise cut along the inside curve, creating a small opening.
- Stuff with Toppings: Stuff the opening with a combination of mini marshmallows, chocolate chips, chopped nuts, and any other favorite toppings you desire. Be creative!
- Wrap in Foil: Wrap each banana tightly in aluminum foil, ensuring that the foil is securely sealed.
- Heat on the Campfire: Place the foil-wrapped banana boats on the campfire grate or directly onto hot coals. Let them cook for about 5-10 minutes, depending on the heat of your fire. You’ll know they’re ready when the toppings are melted, and the banana is soft.
- Carefully Unwrap: Using forks or wooden skewers, carefully unwrap the banana boats. Caution: They’ll be hot!
- Enjoy Your Campfire Banana Boats: Dive into the gooey, sweet goodness of your campfire banana boats. Be cautious; they can be quite hot at first.
Pro Tips:
- Experiment with different toppings like caramel sauce, crushed cookies, or even a drizzle of honey.
- Keep a close eye on the banana boats while they’re cooking to prevent burning.
Campfire banana boats are a delightful treat that combines the natural sweetness of bananas with your favorite toppings, all warmed to perfection over the campfire. It’s a fun and interactive dessert that campers of all ages will love. Enjoy this sweet and satisfying camping dessert on your next outdoor adventure!
Drinks
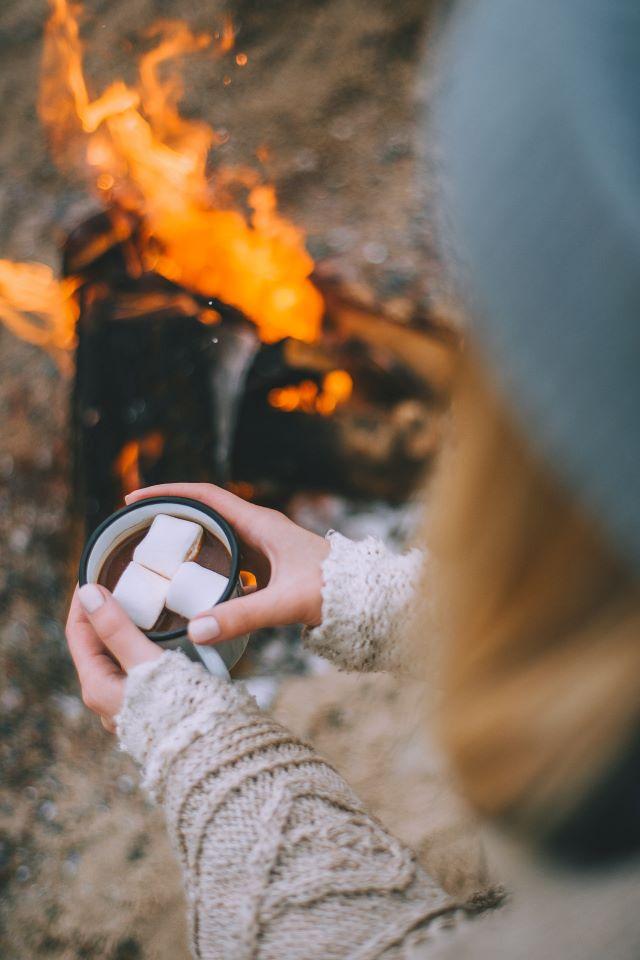
Hot cocoa with marshmallows
Nothing beats the chill of a cool night quite like a warm cup of hot cocoa by the campfire. This classic camping beverage is a comforting and indulgent treat that brings an extra layer of coziness to your outdoor experience. Learn how to make the perfect cup of hot cocoa with marshmallows to enjoy during your camping adventures.
Ingredients:
- Instant hot cocoa mix (individual packets work well)
- Water (as indicated on the cocoa mix packet)
- Mini marshmallows
- Optional: a pinch of ground cinnamon or a splash of vanilla extract for extra flavor
Equipment:
- Campfire or camp stove
- Pot or kettle for heating water
- Camping mugs or cups
- Stirring utensil
Instructions:
- Heat Water: Place a pot or kettle over the campfire or camp stove, and heat the appropriate amount of water according to the instructions on the hot cocoa mix packet.
- Prepare Cocoa Mix: Once the water is hot, pour it into camping mugs or cups. Add individual packets of instant hot cocoa mix to each mug. If you’re using a large container of cocoa mix, measure the appropriate amount for each cup.
- Mix Thoroughly: Stir the cocoa mix and hot water together until it’s fully dissolved. This ensures a rich and creamy hot cocoa.
- Add Optional Ingredients: If desired, enhance the flavor of your hot cocoa with a pinch of ground cinnamon or a splash of vanilla extract. Stir well to incorporate.
- Top with Marshmallows: Generously top your hot cocoa with mini marshmallows. The heat from the cocoa will help them become soft and melty.
- Enjoy Your Campfire Cocoa: Sip your hot cocoa by the campfire and savor the warmth and sweetness of this comforting drink.
Pro Tips:
- For an extra touch of luxury, bring along whipped cream or chocolate shavings to sprinkle on top.
- Be cautious when heating water over a campfire, and never leave it unattended.
Hot cocoa with marshmallows is a classic camping beverage that brings warmth and comfort to any outdoor adventure. Whether you’re camping in the wilderness or enjoying a cozy night in your RV, this delightful drink is sure to be a hit with campers of all ages. So, grab your mug, gather around the campfire, and savor the simple pleasures of camping life.
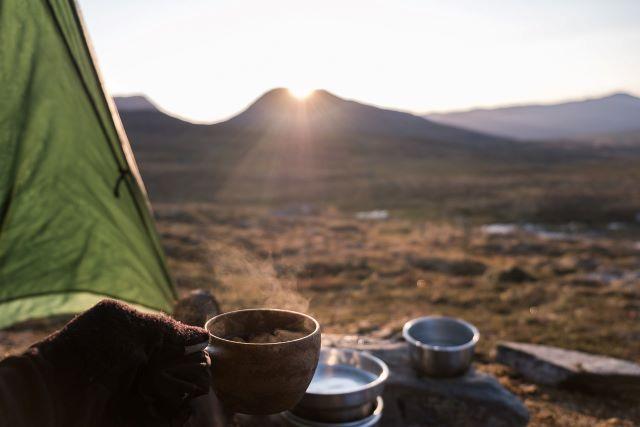
Campfire coffee
There’s something magical about starting your camping day with a steaming cup of coffee brewed over a crackling campfire. The aroma, the warmth, and the simplicity of campfire coffee make it an essential part of any outdoor adventure. Here’s how to brew a perfect cup of campfire coffee to kickstart your day.
Ingredients:
- Coarsely ground coffee beans (preferably a dark roast)
- Water
- Optional: sugar, cream, or your preferred coffee additives
Equipment:
- Campfire or camp stove
- Coffee pot or kettle
- Coffee filter or a special campfire coffee maker (e.g., a percolator)
- Mug or camping cup
- Stirring utensil
Instructions:
- Heat Water: Place a pot or kettle filled with cold water over the campfire or camp stove. Measure enough water for your coffee plus a little extra for rinsing and warming.
- Prepare Coffee: While the water heats, measure out your coarsely ground coffee beans. A good rule of thumb is to use about 2 tablespoons of coffee for every 6 ounces of water but adjust to your taste preference.
- Rinse and Preheat: Pour a small amount of the heated water into the coffee pot or percolator to rinse it and warm it up. Discard this water.
- Add Coffee: Put the coffee grounds into the pot or percolator. For a richer flavor, you can stir a pinch of coffee grounds into the boiling water before you add them.
- Brew: Place the coffee pot or percolator over the campfire or camp stove and let it brew. The water should bubble up through the coffee grounds, infusing them with flavor. Brew for about 4-5 minutes, but adjust to your taste.
- Pour and Serve: Once brewed, carefully pour the hot campfire coffee into your camping mug. Be mindful of the hot handle and pot. Add sugar, cream, or any other desired additives to taste.
- Enjoy Your Campfire Coffee: Sip your freshly brewed campfire coffee by the fire, taking in the beauty of nature around you. It’s a wonderful way to start your camping day.
Pro Tips:
- If you don’t have a coffee filter or percolator, you can brew coffee cowboy-style by boiling the grounds directly in the water. Just be prepared for a little extra grit in your cup.
Campfire coffee is the perfect companion for your camping adventures. Its rich flavor and the process of brewing it over an open flame make it a cherished ritual for outdoor enthusiasts. So, whether you’re waking up to the sunrise in the wilderness or enjoying a leisurely morning at the campground, a cup of campfire coffee will make your camping experience even more memorable.
See also: 102 Best Camping Food Ideas You Can’t Go Wrong With
Tips for Efficient Cooking on the Go
Prepping ingredients in advance
Efficient campsite cooking starts with smart ingredient preparation. Here’s how to do it:
- Plan Your Meals: Make a meal plan and list of needed ingredients to avoid overpacking.
- Pre-Measure Dry Ingredients: Portion spices, herbs, and dry items into labeled containers or bags.
- Pre-Cut Veggies and Fruits: Slice and chop them at home, then store in sealed bags or containers.
- Marinate Early: Prepare marinated items at home and pack them in ziplock bags.
- Pre-Cook Ingredients: For foods like pasta or rice, cook them partially or fully before your trip.
- Embrace One-Pot Meals: Simplify by making dishes that require fewer pots and pans.
- Foil Packets: Wrap ingredients in foil and cook over the campfire or grill.
- Pre-Made Sauces: Prepare sauces and dressings in advance for quick flavor boosts.
- Label Everything: Clearly mark containers with contents and cooking instructions.
- Smart Packing: Organize ingredients logically for easy access.
- Leftovers Plan: Consider how to use leftovers in upcoming meals.
- Minimize Waste: Use reusable containers, follow Leave No Trace principles, and dispose of waste responsibly.
Prepping ahead ensures smoother cooking and more enjoyment during your camping experience.
Safety Tips and Leave No Trace Principles
As you embark on your car camping cooking adventures, remember these essential safety tips and principles to minimize your impact on the environment:
Safety Tips:
- Cook Away from the Tent: Set up your cooking area a safe distance away from your tent and camping gear to prevent accidents.
- Use Stable Surfaces: Place stoves and grills on stable, level surfaces to avoid spills and mishaps.
- Keep a Fire Extinguisher: Have a fire extinguisher, water, or sand nearby when cooking over an open flame.
- Supervise the Fire: Never leave a campfire or stove unattended, especially when food is cooking.
- Avoid Overcrowding: Prevent accidents by limiting the number of people around the cooking area.
- Use Oven Mitts or Gloves: Protect your hands when handling hot cookware and campfire tools.
Leave No Trace Principles:
- Plan Ahead: Prepare your meals and cooking equipment thoughtfully to minimize waste.
- Travel and Camp on Durable Surfaces: Use established fire rings, grills, or camp stoves when cooking to protect the environment.
- Dispose of Waste Properly: Follow “pack it in, pack it out” guidelines, leaving no food scraps or trash behind.
- Leave What You Find: Preserve the natural beauty of your campsite; avoid damaging plants and trees when setting up your cooking area.
- Minimize Campfire Impact: Use a camp stove for cooking to reduce the impact on the environment.
- Respect Wildlife: Store food securely to prevent wildlife encounters and avoid feeding animals.
- Be Considerate of Other Visitors: Keep noise levels down and be mindful of others who may be enjoying the tranquility of nature.
- Use Biodegradable Soap: If washing dishes, use biodegradable soap, and disperse wastewater at least 200 feet from lakes and streams.
By adhering to these safety tips and Leave No Trace principles, you’ll ensure a safe, enjoyable, and eco-friendly car camping cooking experience.
Final Thoughts
Car camping offers the perfect opportunity to savor delicious meals amidst the beauty of the great outdoors. With these easy and delightful recipes, you’ll satisfy your taste buds while enjoying the simplicity of campsite cooking. Remember, preparation is key, so plan your menu, gather your ingredients, and pack your essential cooking gear.
Embrace the adventure, share fantastic food with friends and family, and create lasting memories around the campfire. Whether it’s a hearty breakfast, savory lunch, or a sweet campfire dessert, these recipes will make your camping trip even more memorable. So, grab your spatula, fire up the camp stove, and get ready for some mouthwatering camping cuisine!
FAQs:
Are these recipes suitable for beginners?
Absolutely! These camping recipes are designed with simplicity in mind, making them perfect for beginners. With a little preparation and the right equipment, anyone can enjoy delicious meals while camping.
What if my campsite doesn’t allow campfires?
If campfires aren’t allowed at your campsite, don’t worry! Many of these recipes can be prepared using portable camping stoves or grills. Be sure to check the campsite rules and regulations before your trip and plan accordingly.
Is there a way to keep my drinks hot or cold while camping?
Yes, there are several ways to keep your drinks hot or cold while camping. Insulated thermoses or bottles work well for hot beverages like coffee or cocoa, while coolers with ice packs can keep drinks cold. You can also use a portable camping fridge or cooler for longer trips.
Can I make these recipes in large quantities for a group camping trip?
Certainly! Most of these recipes can be scaled up to feed a larger group. Just adjust the ingredient quantities accordingly and consider using larger cooking equipment if needed. Cooking for a group can be a fun and rewarding experience, so don’t hesitate to share these delicious meals with your camping companions.